
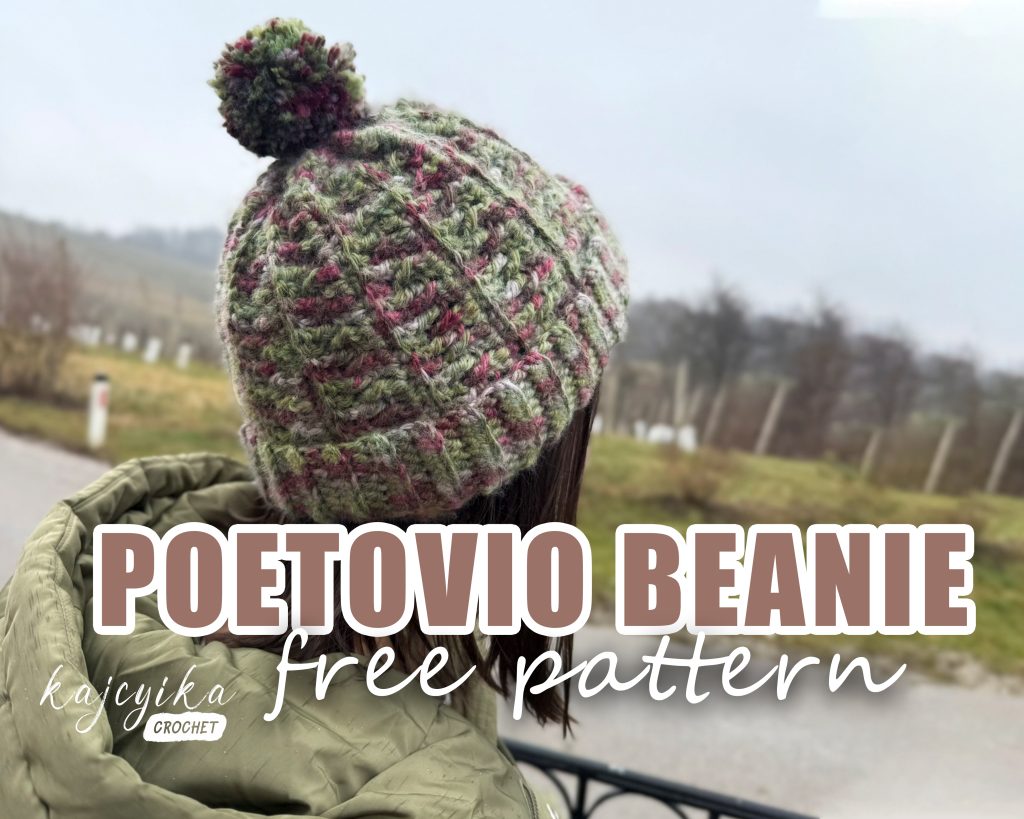
This crochet beanie features a clean and simple design with just the right amount of charm. It’s cute, comfortable, and easy to wear, making it a staple for cooler weather. Worked with straightforward stitches and a smooth texture, it comes together quickly, making it a great choice for beginners or anyone who wants a fast, satisfying project with a polished look.
Disclaimer
Please do not copy, redistribute, or resell this pattern in any way, including creating a video tutorial. You may sell your finished piece but please credit me as the pattern designer.
If you share your piece on social media, please credit me as the pattern designer. I would love if you tag me!! I really enjoy seeing your beautiful work.
Gauge
This pattern is made to measure, so you don’t need to obtain any gauge.
Materials
- No specific yarn is required, but I would recommend using at least weight 4 (Medium/Worsted) weight yarn or combining multiple yarns to achieve the cozy look.
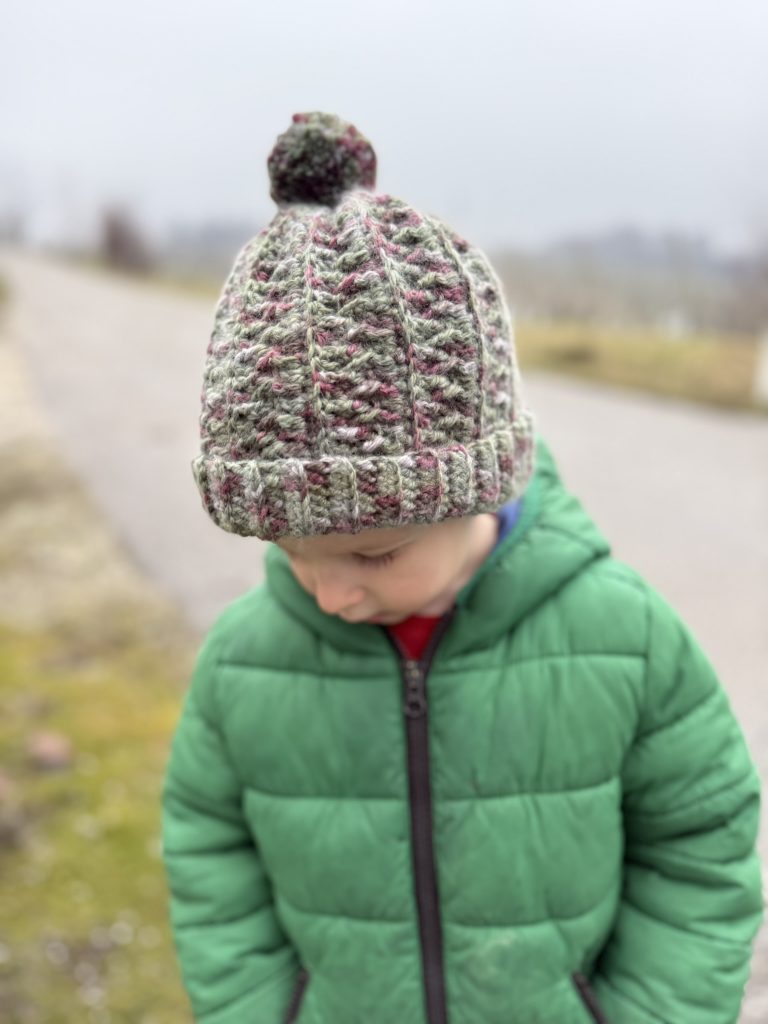
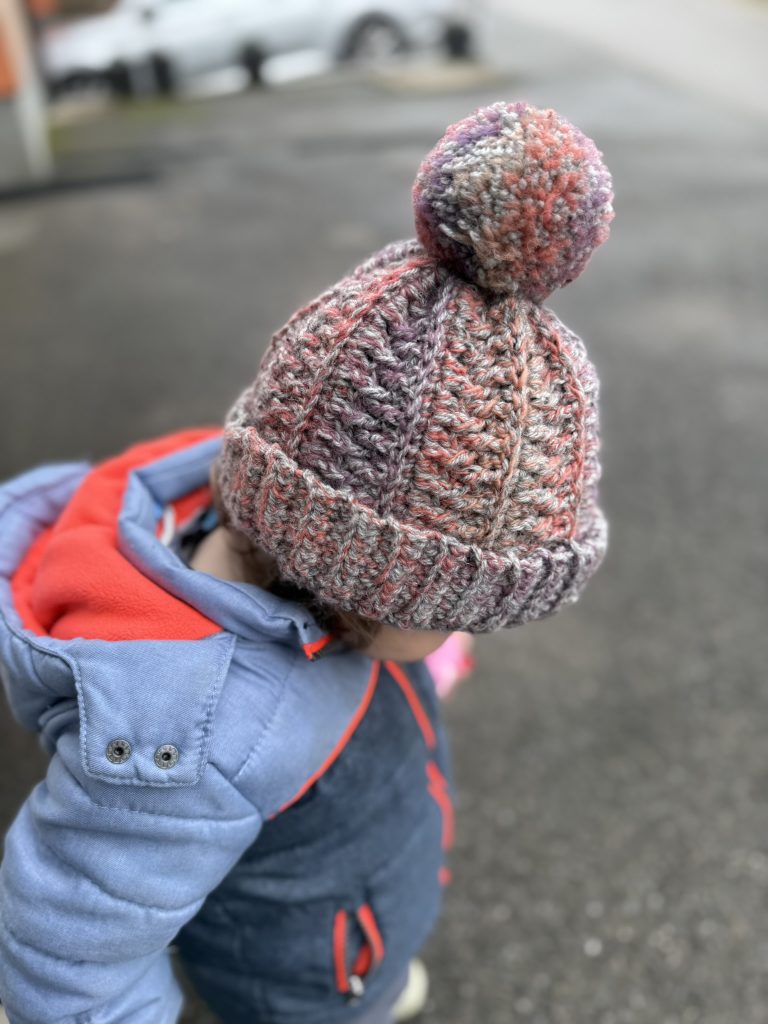
For the first example, I used Yarnart – Tweed 226 held together with DIY handmade – Boston.
For the second one I used DIY handmade – Romy
- Crochet hooks. I used a 6mm hook
- Stitch markers
- Sewing needle
- Scissors
- Tape measure
Abbreviations
US terminology
YO – Yarn over
CH – chain
Sk – skip
St – stitch
Rep – repeat
SS – slip stitch
SC – single crochet
HDC – half double crochet
DC – double crochet
BLO – back loop only
FPDC – Front post double crochet
BPDC – Back post double crochet
DC dec – Double crochet decrease
RS – right side
WS – wrong side
Pattern Notes
- The pattern is not reversible, meaning you should pay attention to the right side (RS) and wrong side (WS) of your project.
- The beanie is worked in one piece, starting with the textured section. This section is closed together, after which the brim is added.
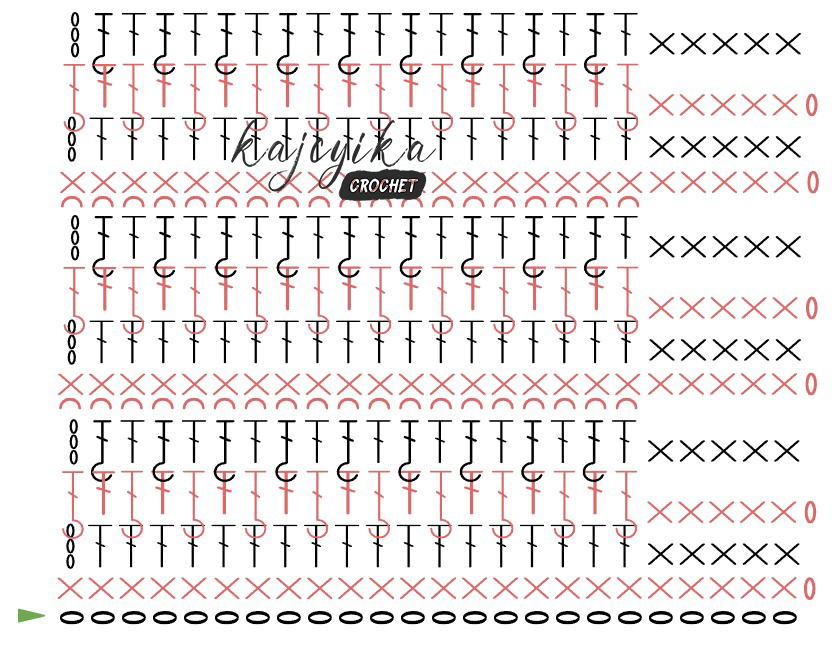
- Chain 3 counts as the starting st of the next row (see chart for better understanding)
- Chain 1 doesn’t count as the starting st of the next row.
- You can replace chain 3 turning chain with stacked single crochet.
- The post is the vertical part of the stitch from the previous row.
Measurements
The pattern is made to measure. Before you start, measure these 2 things and mark them down:
Measurement X: Height of the textured part of the beanie
measure from the top of your head to your nose and reduce by 2” (5cm)
Measurement Y: Circumference
measure around the head, about two fingers above the eyebrows, passing around to the widest part at the back of the head and reduce by 2” (5cm)
My version is made with 2” (5cm) of negative ease, if you think that your yarn is not very stretchy then I would recommend reducing the measurements by just 1” (2.5cm). If you think that your yarn is super stretchy then I would recommend reducing the measurements by 3” (7.5cm).
If you are using multiple yarns make sure to check how they stretch together to ensure correct circumference.
Special stitches
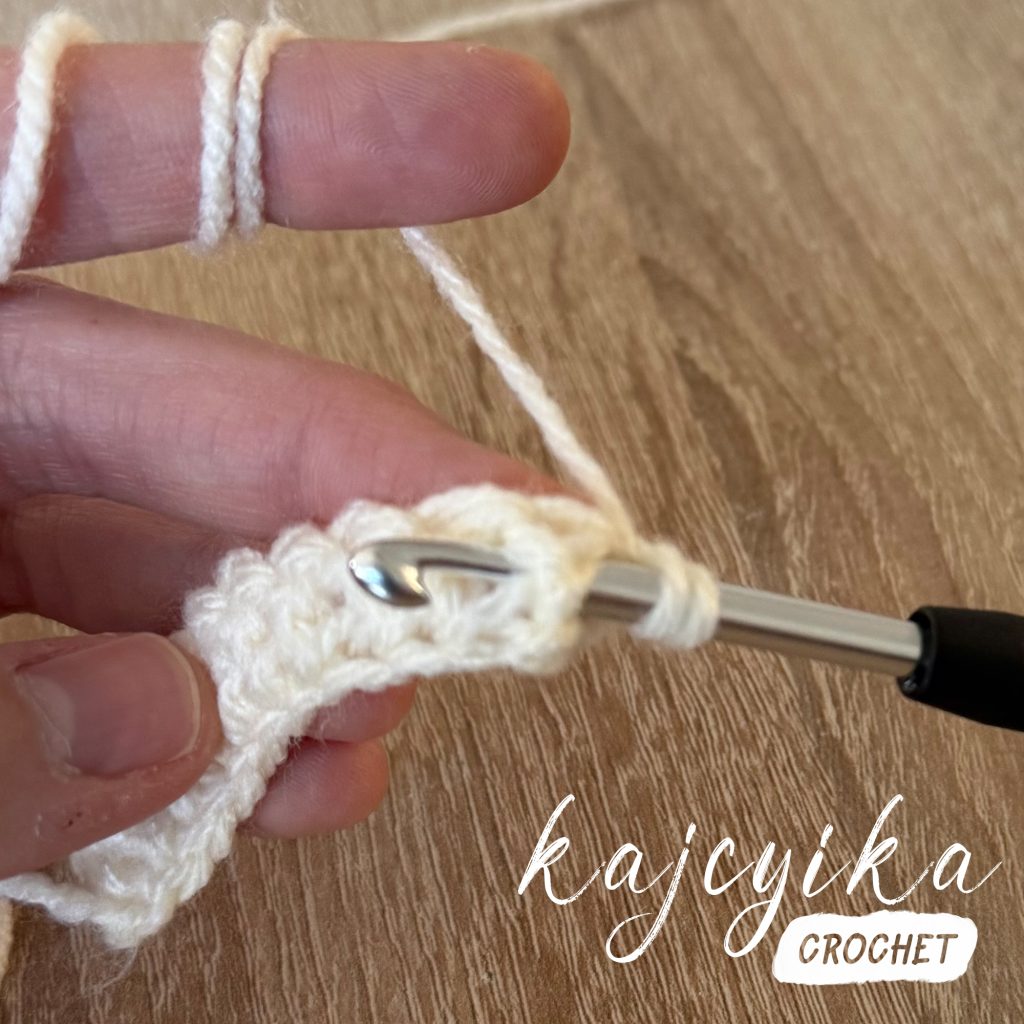
FRONT POST DOUBLE CROCHET
YO, insert your hook from front to back to front around the post of the designated stitch (instead of into the top loops)
YO, pull up a loop (you’ll have 3 loops on your hook)
YO, pull through 2 loops
YO, pull through the remaining 2 loops
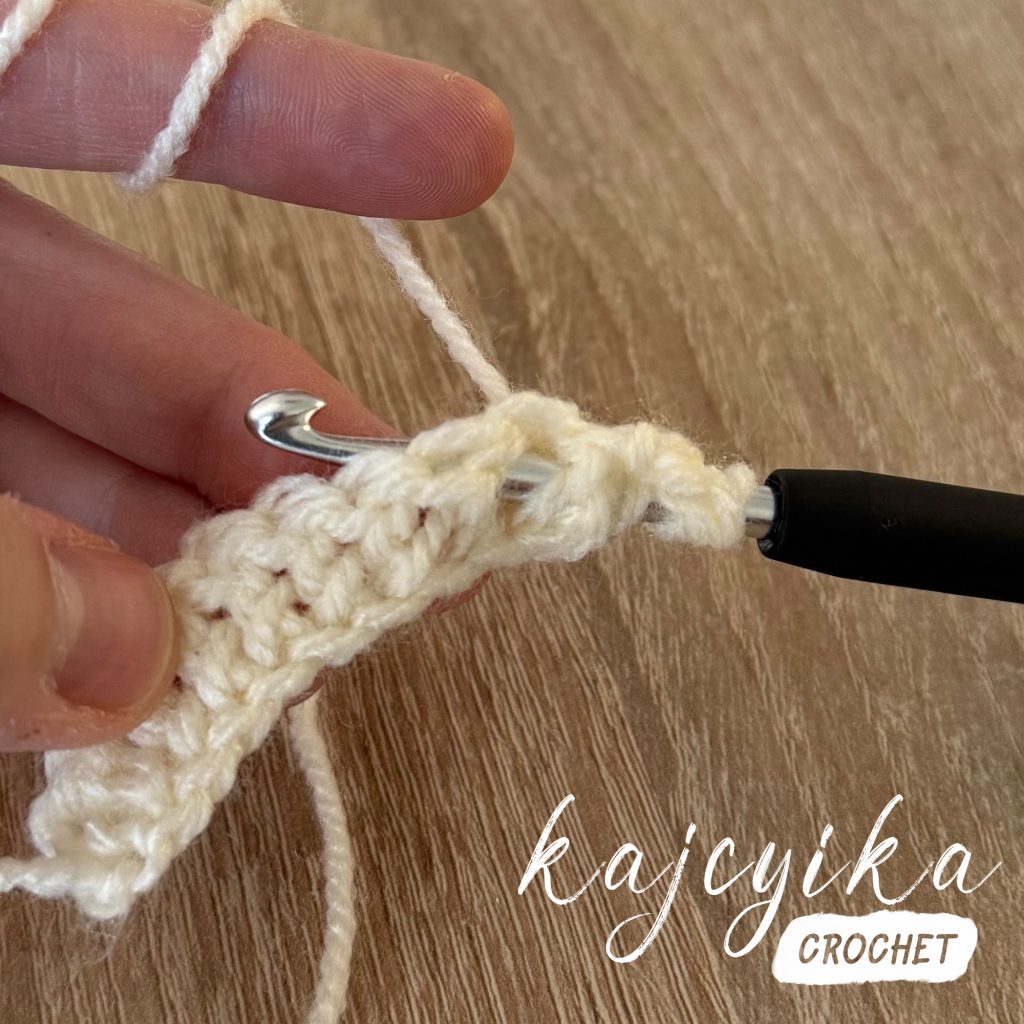
BACK POST DOUBLE CROCHET
YO, insert your hook from back to front to back around the post of the designated stitch (instead of into the top loops)
YO, pull up a loop (you’ll have 3 loops on your hook)
YO, pull through 2 loops
YO, pull through the remaining 2 loops
PATTERN
Textured panel
Row 1: Chain an even number of chains in the desired height (measurement X).
Row 2 (RS): Chain additional 1. SC into the 2nd ch from the hook and into all the remaining ch until the end.
Note: Before working on row 3, remember that chain 3 counts as the starting st of the row, meaning your first DC should be worked into the 2nd st from the last row. In the end, your row should be: a starting chain 3, an even number of DCs, plus the 5 SCs. (see chart for better understanding)
Row 3 (WS): Chain 3 and turn. DC until 5 sts remain, SC into the remaining sts.
Row 4 (RS): Chain 1 and turn. SC into the first 5 sts, FPDC, *DC,FPDC* until the end. Your last stitch should be FPDC around the turning chain of the previous row.
Row 5 (WS): Chain 3 and turn. *BPDC, DC* until 5 sts remain, SC into the remaining sts.
Note: Don’t forget that chain 1 in row 5 doesn’t count as stitch, meaning you should do SC in the first st from the last row.
Row 6 (RS): Chain 1 and turn. SC into the first 5 sts, BLO SC into the remaining sts.
Repeat Row 3 through Row 6 until you reach measurement Y, ending with row 5 (*BPDC, DC* row). Do not cut the yarn!
Join the sides together using SS into backloops of your last row and the starting chain. Make sure that the right side is facing you.
If you plan to add the brim, leave the yarn attached. If you’re skipping the brim, you can go ahead and cut the yarn.
Chart:
Closing the beanie
To close the top of the beanie, cut a long tail of yarn. Using a needle, weave the yarn through the sides of the SC stitches around the opening. Gently pull the yarn tail tight to cinch the top closed, then secure with a few stitches and weave in the ends on the inside of the beanie.
Brim
You can include the brim if you’d like, but it is completely optional and not required to finish the beanie. If you choose to add it, follow the instructions below to create the brim as written.
Change your hook and use a smaller one. I used a 6mm hook for the main part and a 5mm for the brim.
Base row: SC around the bottom spacing the stitches equally. My suggestion is to do two or three SC into the CH3 and sides of the DCs, while doing one SC into the side of the SC. Join the round with SS into the first SC.
Before continuing, turn your work so you are working on the wrong side of the beanie. The brim will be folded later, and this ensures the right side of the pattern faces outward once the brim is folded.
Row 1: Chain 10 (or any other number of chains that gives you the desired size of the brim. The calculation expects the brim to be 2 inches)
Row 2: Chain 2 and turn. BLO HDC into the 3rd CH and all remaining CHs.
Row 3: SS into the next 3 St of the base row. and turn. BLO HDC into the top of the first HDC (4th St) and all remaining HDCs.
Row 4: Chain 2 and turn. BLO HDC into the 3rd st (last HDC from previous row) and all remaining HDCs.
Repeat row 3 and 4 until you reach the last base stitch. Join the round by SS through both, the starting chain and BLO of your last row of HDCs. Cut the yarn and pull through.
After finishing the brim, fold it upward to form the finished beanie shape, with the right side facing outward.
Pom-Pom
Adding a pom-pom is optional. You may choose to use a store-bought pom-pom or create a handmade one using yarn that matches or complements your beanie.
For this design, I chose to make a handmade pom-pom measuring approximately 2.75” (about 7 cm) in diameter.
Finishing touches
The final step is to weave in all the ends, then your beanie is ready to wear and enjoy!